Wednesday, November 27, 2013

Toy Box Re-do

So I have this old toy box from when my sister and I were kids and I really wanted to reuse it. It's pretty ugly and not well taken care of so I knew I wanted to recover it. I searched Pinterest for some inspiration:
Reupholstered Storage Bench
I like how this one has legs on it and two different fabric choices.


reupholstered ottoman-great idea. I prefer these hinges to the piano bench hinge.
I liked how this lid was filled in so it looked softer in case it slammed on your fingers.

 
Well after looking at some inspiration I shortcut what the Pinterest folks did because I was short on energy and just wanted the project completed :) I can always make changes to it later since I only used inexpensive fabric and a staple gun.

Here is where I started.

The toy box is mostly made of particle board so I was afraid if I took off the vinyl fabric the whole thing would fall apart - it is from the 70s/80s so I wouldn't have been surprised. So I decided to re-cover the box right over what was there. That made things super easy!


Here is the original box - I forgot to take a pic of it with the lid on before I started my project. It had little bears all over it and a sort of plaid design.


You can see I found this gray outdoor fabric that I decided to use for the bottom of the box. It was on clearance so I got 2 yards for $9 - great deal!

I took off the hinges that connected the lid to the box and put the box on the fabric as the above picture shows. I then decided to cut out squares along each corner so that I could wrap the fabric into the box and not have a horrible looking seam. I had to google how to do this and found some good YouTube videos that gave me the idea. You can kind of see what I cut out in the above picture and below picture as well.


I was playing around with the fabric in this picture and clipping the fabric around to make sure it was going to turnout how I wanted it to. I didn't want to start stapling and have issues.

Final project after folding the fabric into the box and stapling around the edges. I had about 2-3inches where I used the fabric inside the box and stapled it rather than cutting the fabric and stapling right near the top edge of the inside of the box (hope that makes sense). I only had the very small seams on the ends where I folded in the fabric but I think it looks really good!!


Next I had to figure out what to do with the lid. It definitely needed some additional cushioning so I added a piece of 2inch batting to the top (I didn't glue it down or anything - again I was short cutting everything). I just laid the lid down on the batting and then on new fabric I bought (which was also on clearance).

I starting stapling the fabric around the lid  making sure I knew where to screw the hinge back in (in this picture I had just screwed it in). I had left over batting so I added to the inside of the lid so that it wasn't hollow any longer. I think took an extra piece of the fabric and stapled that across where I but the batting.

Another picture of be working with the fabric. What I like about this fabric is it had a lot of difference colors in it so I could use it with a variety of things.

AND THE FINAL REVEAL...which really didn't take me that long in total time even though I did this over several weeks.


I had bought furniture legs to add to the bottom that I was going to screw in and paint but I decided to take those back. I think it's fine without the legs but I can always add those anytime if I want to. I think it turned out great for how easy it was to make! Can't wait to use fill it up and start using it. 

Wednesday, November 20, 2013

Thankful for...

We have so much to be thankful for this year but one thing in particular is that we have been blessed with a miracle! We are HAVING A BABY! We are super excited about it. AND...we are having a GIRL! We both secretly wanted a girl so it was exciting to find out that it was a she. I got to find out really early (14 weeks) because I did a special blood test called the Harmony test. One of the items they can test for is gender (they pretty much check my blood to see if I have a Y Chromosome in my blood which would mean I'm carrying a boy - there was no Y). It's 99% accurate so I was excited to find out early. Otherwise I would have had to wait until our 20 week ultrasound. The blood test also let us know that we have a healthy baby with no chromosome issues!


Since I was told the gender on the phone I got to do a fun gender reveal for Ryan. It took everything in me not to call him as soon I as found out the news. I wanted to shout it from the rooftops but I calmed myself down and came up with a plan.

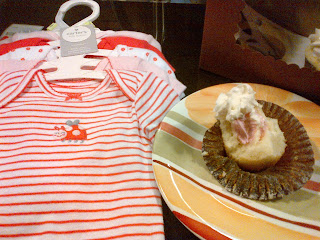
I ran out to a local cupcake shop at the mall. I was just going to get a cupcake with pink frosting on the top BUT they were nice enough to make me a gender reveal cupcake while I waited. They put the pink frosting inside the cupcake so Ryan would have to take a few bites to get an answer :) I then went to Babies R Us and got  a cute outfit to wrap up in a gift bag for him to open. Here are some of the pics from that day.

Of course I bought one for myself to eat as well. YUMMY!
This is the card I wrote for Ryan to open first

 
Here he was opening and reading the card. He had no idea what was going on since I didn't tell him I should be getting the blood test results back today!

It took more than a bite or two to get to the frosting but there it is - PINK!
 

And I couldn't resist this cute set of outfits with little pink pants. So sweet!
We also were super motivated so we have made some progress on the nursery as well. That will be on the next blog post but here is a preview - I'll post more on how we got to this point in another post!


More posts to come...

I haven't posted in awhile but I'll have a bunch of updates to post over the next week so be on the look out. I'll link my posts to Facebook for easy access! :)

More to come.

Saturday, June 29, 2013

Quick trip to Reno/Tahoe

I had never been to Reno - and you may be asking why would you even want to go to Reno? It wasn't so much to spend time in that small city but to venture out and really see the area and drive out to Lake Tahoe. It was great!

The weather was perfect - super sunny and warm. We brought our tennis rackets in our suitcase and found a park along the Truckee River and played two different mornings on our short trip. We also walked about 2 miles to get to a beautiful park near the Univ of Nevada and really loved checking that out.

We did gamble a bit and went through all the casinos in Reno...nothing special but some of the city has been redone and is super nice - near the Truckee River.

Then on Sunday before we left we drove a little over an hour to Lake Tahoe and spent some time in South Lake. South Lake borders CA and NV. It was actually really nice so we are thinking the next time we visit this area we'll definitely stay near by and spend more time in this area. It's more expensive then staying in Reno but it's so beautiful.

Here are some pics from our short trip.


Ryan had a free 5 minutes of playing this slot and if he was in the top 5 highest scores for the day he would win something. Sadly he didn't make the top 5.
We walked to this great park from the hotel.


Beautiful Lake Tahoe!


Heading over to Lake Tahoe. Beautiful mountains.


Sunday, April 21, 2013

Stripes

Ryan and I have been getting fit over the last few months (between our two neighbors and us we lost a total of 80lbs combined!) so I felt our workout room needed a little sprucing up. I didn't want to do a whole lot so as I searched on pinterest I realized stripes may be the way to go. Since I wanted to minimal painting I stuck with the original color of the wall and just needed to find a paint color that would coordinate.

Here is the blank walls I started with. Literally nothing was on these walls since we moved in so it was just beige, beige and more beige. Well we had mounted a TV to the mall and calendar so I guess there were a few things on the wall but nothing that looked nice :)


Next I needed to chose a color. Since I wanted to coordinate with the current color and the color of the baseboards and molding around the closet and main door I went with the color "ivory tower" - the top color of the paint swatch below. 


Pretty lucky guess on the paint color because it turned out to match the molding exactly...which makes the room really come together....keep reading to see the end result.
 
Pinterest was great with having so many tutorials on how to paint stripes. I bought some frog tape and began taping. I only wanted to paint two stripes. So I measured the wall from floor to ceiling and divided by 5 (with only painting two of the 5 stripes). I wanted to make this super easy as well so I didn't want to paint the stripe that was close to the floor or close to the ceiling...that made this sooooo easy!
 
To make the lines I took a laser level and just penciled a line all along the wall. I did this all on my own so it is doable with just one person.


I may be able to tell from the above picture but I made sure to put a piece of tape in the stripe that I didn't want to paint in so that I didn't mistakenly start painting in the wrong stripe. Then I started painting the ivory stripes. I also got at Lowe's these cheap white mirrors ($6 a piece) and got some command strips to stick the mirrors to the wall. I put some cork board squares up on the wall so that we could pin our race numbers and goals to the wall. I love how it turned out. I didn't take another picture but I also striped the opposite wall as well. The back wall still needs something but I'm looking for an inspirational quote to add and just haven't found the right one yet. 


Thursday, April 18, 2013

Trips

Well I haven't posted an update in while. Here is an update on the trips we took the last couple of months.

In February we went to Arizona to visit Ryan's uncle and aunt (Ken and Kathy). They live in a new community near the town of Elo (southern AZ) and we spent 4 days with them. We went to a golf tournament one day, I went shopping with Kathy at Mesa Market Place one day and tried our best to stay active while we were there.

We then went up to the Phoenix area and spent time with my relatives on both the Cadiz and Pool side. It was great to see everyone during this visit.

Then in March we went to Puerto Vallarta with our friends and neighbors, Leah and Jaurdey. It was so much fun. We rented a condo that was huge - 3000sq ft with wrap around balconies facing the ocean. It was amazing. The pool was pretty cool as well - though it was partially under construction so that part wasn't cool.

Her are pics from our travels:


We went to Pipi's in the above pictures. It was pretty cool restaurant. A must see if you ever visit PV.

We found this tiki hut restaurant were we sipped a few drinks on the beach. It was actually a little chilly at this point in the night but we loved this spot.


These pics above were taken at Barracuda restaurant - a pain to fine but pretty good food.
 
I'm ready to plan our next trip - Hawaii again maybe?


Thursday, February 14, 2013

Mudroom complete


So after we put a new closet near our front door, that left an empty closet near our door to the garage so my thought was to change it into a mudroom area where you can hang purses and take your shoes off, etc.

So I felt motivated to paint and get it all organized. I painted it green so I may use the rest of the gallon somewhere else in the house since I really like the color. Then I installed a light system and hung a shelf unit. Ryan had installed the cat door a few weeks ago. More on that in a moment. Here are some pictures of the project:


Above are pictures of the lighting system I put in. They are really for under-mount cabinet lights but they have a little switch and plug in so obviously super easy then. They are hidden behind the wall so you don't really focus on the fact that there is a cord and I linked two of the lights together so it's a good amount of light into the small room now.

I painted the room a pretty green as I mentioned but my cell phone pictures don't really do it justice.


And then the final look after I put the decor and shelf in:

 
Our new coat closet turned mudroom room. It's probably not much of an actual mudroom
but it's still a great place to hang your coat purse and take your shoes off :)

So the story with the cat door. You can see it in the above pic but our goal is to get the cats to go through this door so they can right into a cabinet in the garage where their liter is. It's all up and ready for use BUT the cats are afraid to actually go through the door. SO they haven't used the liter out there yet. We keep trying to get them to go through the door but nothing yet. Hopefully soon as it will be super nice to have the liter in the garage.

Here is a picture of the cabinet from the garage side of things. If they just walk through the cat door they would end up in this cabinet to use their liter (so they aren't really roaming the garage free at all). I'm hoping it will work as we begin to train them. Scooter will be the hardest to train.