 |
| I like how this one has legs on it and two different fabric choices. |
 |
| I liked how this lid was filled in so it looked softer in case it slammed on your fingers. |
Here is where I started.
The toy box is mostly made of particle board so I was afraid if I took off the vinyl fabric the whole thing would fall apart - it is from the 70s/80s so I wouldn't have been surprised. So I decided to re-cover the box right over what was there. That made things super easy!
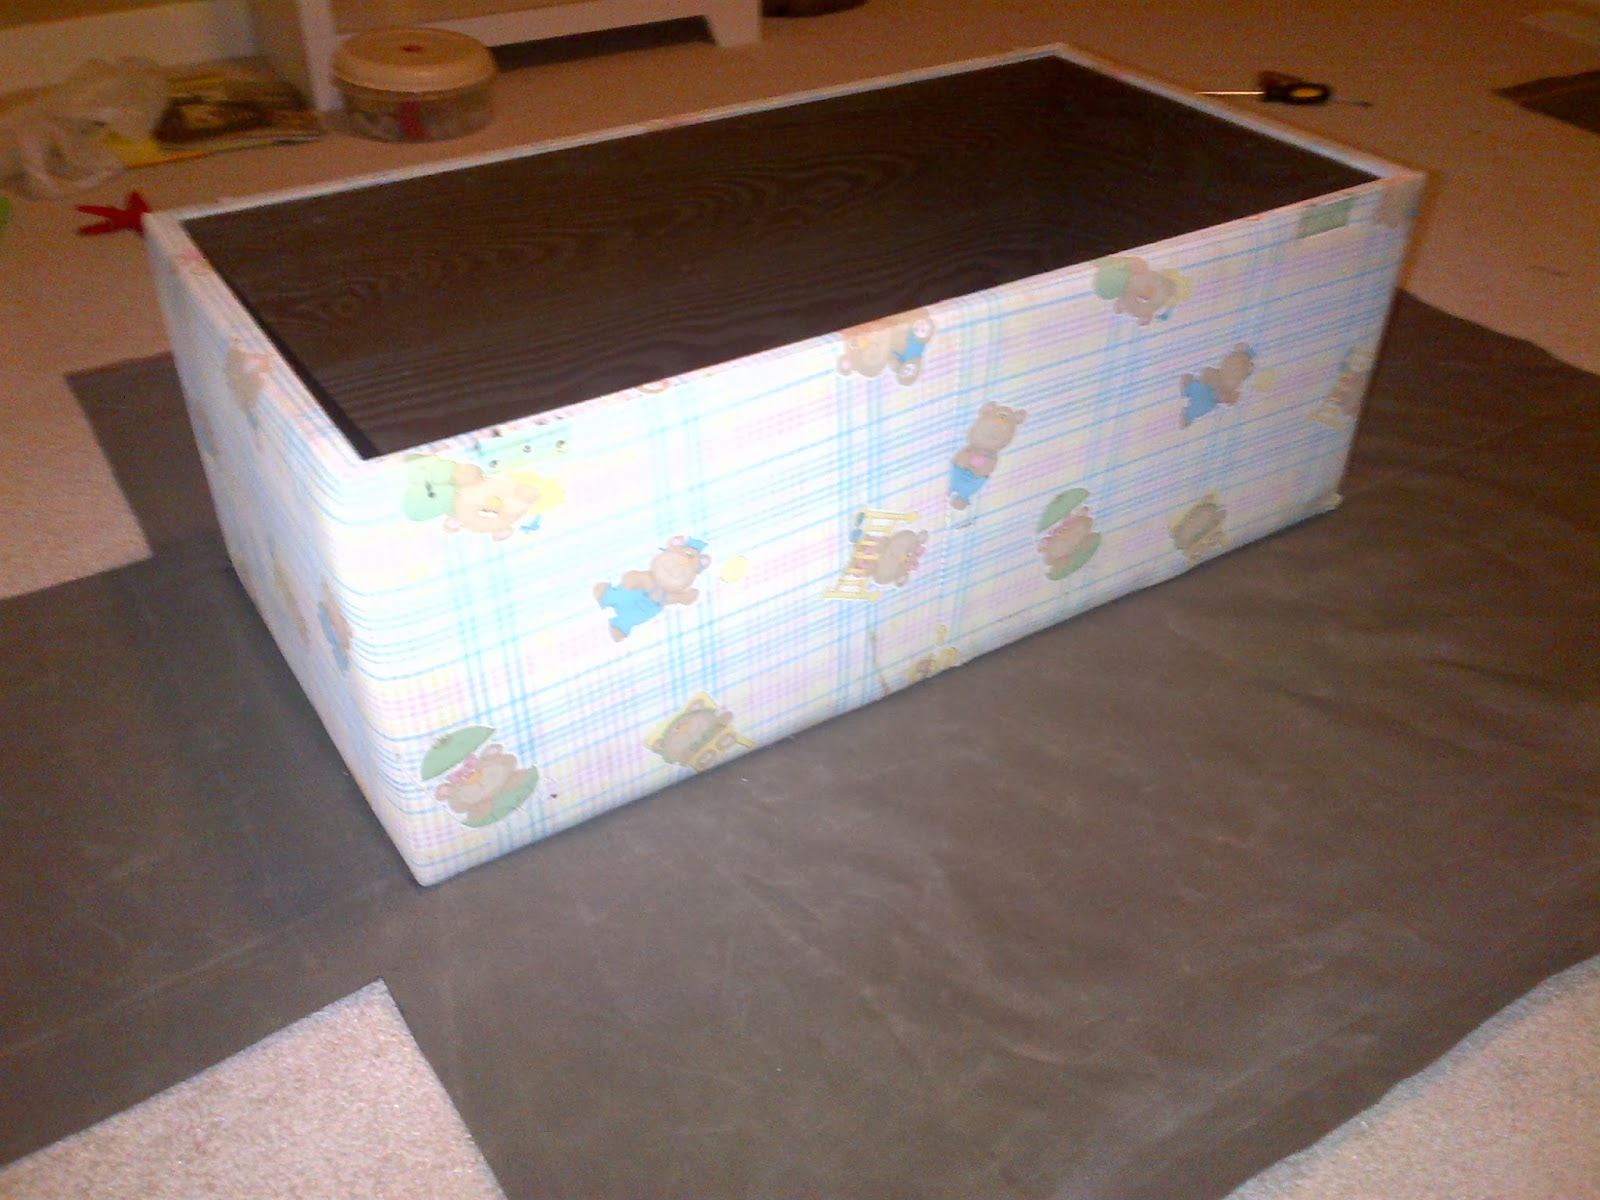 |
| Here is the original box - I forgot to take a pic of it with the lid on before I started my project. It had little bears all over it and a sort of plaid design. |
 |
| You can see I found this gray outdoor fabric that I decided to use for the bottom of the box. It was on clearance so I got 2 yards for $9 - great deal! |
I took off the hinges that connected the lid to the box and put the box on the fabric as the above picture shows. I then decided to cut out squares along each corner so that I could wrap the fabric into the box and not have a horrible looking seam. I had to google how to do this and found some good YouTube videos that gave me the idea. You can kind of see what I cut out in the above picture and below picture as well.

 |
| I was playing around with the fabric in this picture and clipping the fabric around to make sure it was going to turnout how I wanted it to. I didn't want to start stapling and have issues. |
 |
| Final project after folding the fabric into the box and stapling around the edges. I had about 2-3inches where I used the fabric inside the box and stapled it rather than cutting the fabric and stapling right near the top edge of the inside of the box (hope that makes sense). I only had the very small seams on the ends where I folded in the fabric but I think it looks really good!! |

Next I had to figure out what to do with the lid. It definitely needed some additional cushioning so I added a piece of 2inch batting to the top (I didn't glue it down or anything - again I was short cutting everything). I just laid the lid down on the batting and then on new fabric I bought (which was also on clearance).
 |
| I starting stapling the fabric around the lid making sure I knew where to screw the hinge back in (in this picture I had just screwed it in). I had left over batting so I added to the inside of the lid so that it wasn't hollow any longer. I think took an extra piece of the fabric and stapled that across where I but the batting. |
 |
| Another picture of be working with the fabric. What I like about this fabric is it had a lot of difference colors in it so I could use it with a variety of things. |
AND THE FINAL REVEAL...which really didn't take me that long in total time even though I did this over several weeks.


I had bought furniture legs to add to the bottom that I was going to screw in and paint but I decided to take those back. I think it's fine without the legs but I can always add those anytime if I want to. I think it turned out great for how easy it was to make! Can't wait to use fill it up and start using it.


